Asian Chicken Tenders Recipe with Crispy Panko
This Asian chicken tenders recipe pairs juicy panko-crusted chicken strips with a glossy soy, honey, garlic, ginger, and chili sauce. Bake them until crisp, then dip or lightly drizzle just before serving.
What to Expect from These Asian Chicken Tenders
This is a modern Asian-inspired preparation rather than a dish tied to one specific regional cuisine. The defining combination is a coarse, oven-crisp coating with a sweet, salty, tangy, garlicky sauce and a measured chili kick.
- The chicken should be juicy inside with a golden, crunchy panko crust.
- The soy-honey sauce should be glossy and pourable, not stiff or syrupy.
- Dip the tenders or sauce them immediately before eating to preserve the best texture.
Why the Coating and Sauce Work
The three-part coating is deliberate: flour gives the egg a dry surface to grip, egg acts as the binder, and panko creates an airy crust with plenty of irregular crunch. A small amount of neutral oil helps those crumbs brown in the oven without deep-frying.
- Low-sodium soy sauce supplies salt and umami while leaving room for honey, vinegar, and chili to remain distinct.
- Honey rounds out the soy and promotes gloss; rice vinegar keeps the sauce from tasting heavy.
- Garlic and ginger provide the main aromatic profile, while sesame oil is used as a finishing flavor rather than the primary cooking fat.
- Cornstarch thickens the sauce lightly so it clings without flooding the crust.
Ingredients
- 1 1/2 pounds chicken tenderloins, trimmed and patted dry
- 1/2 cup all-purpose flour
- 2 tablespoons cornstarch, divided
- 1/2 teaspoon black pepper, divided
- 2 large eggs, beaten
- 1 1/2 cups panko breadcrumbs
- 2 tablespoons neutral oil, divided
- 1/4 cup low-sodium soy sauce
- 3 tablespoons honey
- 1 tablespoon rice vinegar
- 2 cloves garlic, finely grated or minced
- 2 teaspoons fresh ginger, finely grated
- 1 teaspoon toasted sesame oil
- 1 tablespoon sriracha, or to taste
- 1 tablespoon cold water
- 2 tablespoons green onions, thinly sliced
- 1 teaspoon sesame seeds
The Key Technique for Crisp, Evenly Coated Chicken
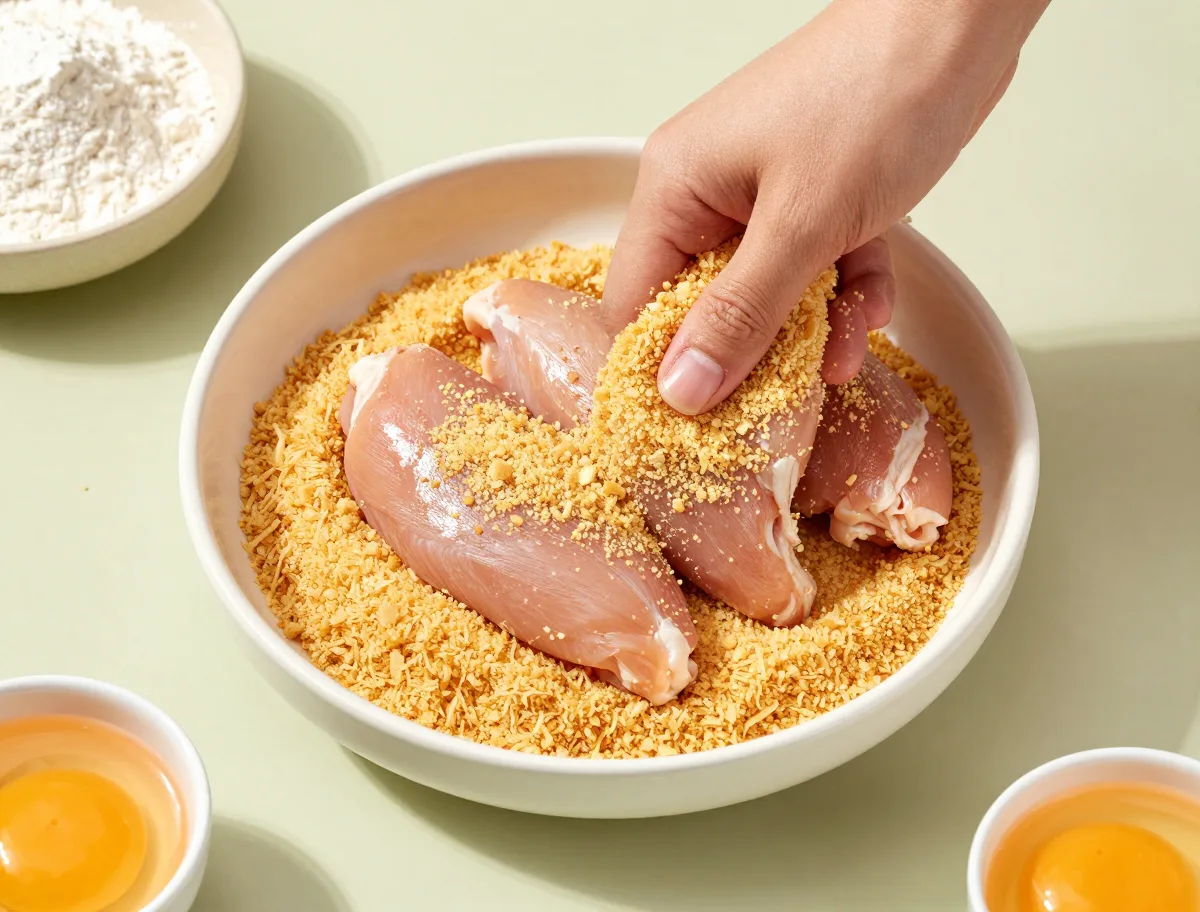
Dry chicken and restrained handling are more important than adding a thick layer of crumbs. Pat the tenderloins dry, shake off excess flour and egg at each transition, and press the panko on firmly enough to adhere without compressing its open texture.
- Use three separate shallow bowls so each coating stage stays distinct.
- Leave visible gaps between the tenders; touching pieces trap steam and brown unevenly.
- A rack lets hot air reach the underside. If using a flat pan, turn the tenders halfway through cooking.
- Prepare the sauce separately and wait until the chicken is fully cooked before applying it.
Instructions
- Heat the oven and prepare the pan: Heat the oven to 425°F (220°C). Set a wire rack over a rimmed baking sheet. Lightly coat the rack with some of the neutral oil.
- Set up the coating: In a shallow bowl, whisk the flour, 1 tablespoon of the cornstarch, and 1/4 teaspoon of the black pepper. Place the beaten eggs in a second bowl. In a third bowl, combine the panko with 1 tablespoon of neutral oil and the remaining 1/4 teaspoon black pepper. Rub the oil through the crumbs so they are evenly moistened.
- Bread the chicken: Dredge each dry chicken tender in the flour mixture, shaking off the excess. Dip it into the egg, let the excess drip away, then press it into the panko until coated on all sides. Arrange the pieces on the rack with space between them.
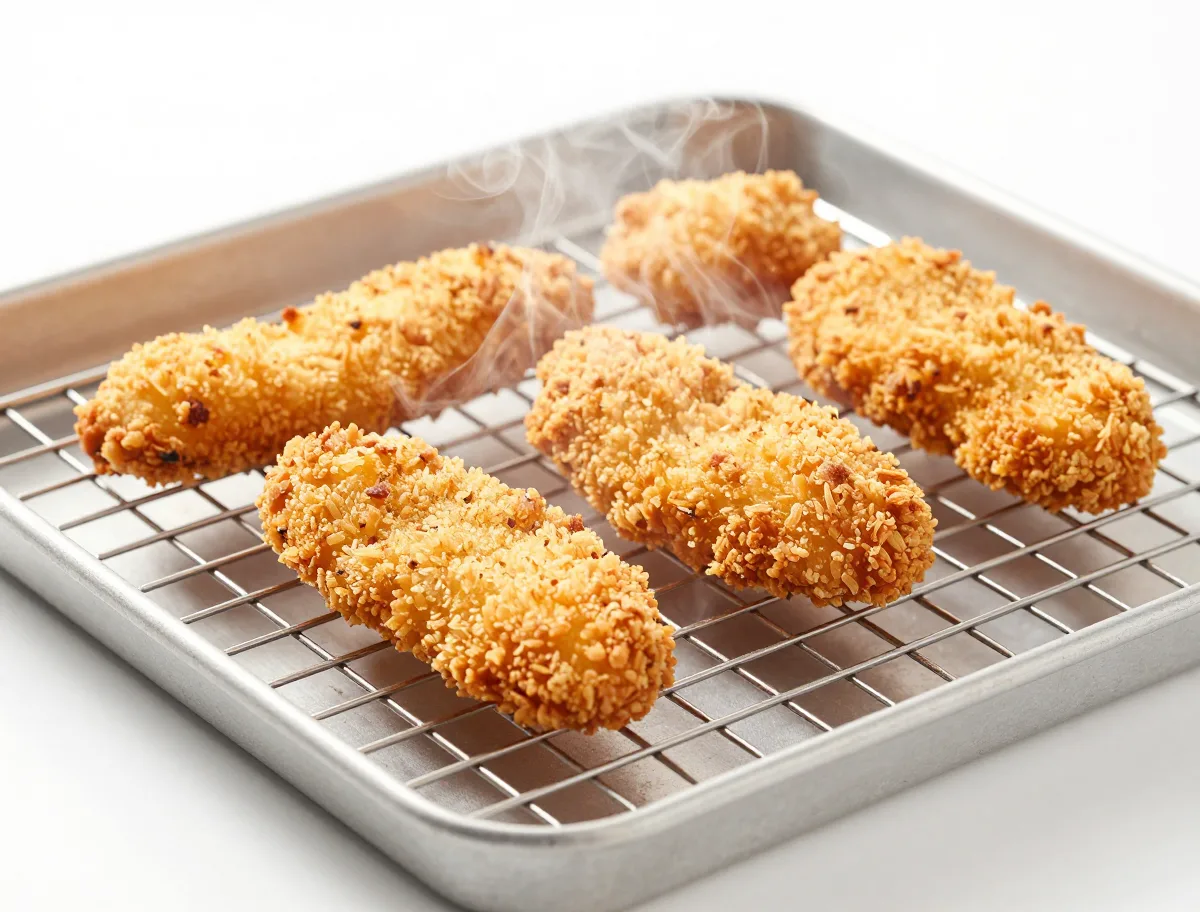
- Bake until crisp and cooked through: Lightly brush or mist the tops of the breaded tenders with the remaining neutral oil. Bake for 9 minutes, turn the pieces carefully, and bake for 5 to 9 minutes more. The coating should be golden and firm, and the thickest part of the largest tender must reach 165°F (74°C) on an instant-read thermometer.
- Cook the sauce: While the chicken bakes, whisk the soy sauce, honey, rice vinegar, garlic, ginger, toasted sesame oil, and sriracha in a small saucepan. Bring to a gentle simmer over medium heat. Stir the remaining 1 tablespoon cornstarch with the cold water, whisk it into the saucepan, and simmer for 1 to 2 minutes, until glossy and just thick enough to lightly coat a spoon.
- Rest briefly and serve: Let the tenders stand uncovered for 2 minutes so surface steam can dissipate. Serve the sauce on the side for dipping, or brush a thin layer over the tenders immediately before eating. Finish with the sliced green onions and sesame seeds.
- Air-fryer alternative: For an air fryer, arrange the breaded tenders in a single uncrowded layer and cook at 400°F (205°C) for 10 to 14 minutes, turning halfway and checking the thickest piece for 165°F (74°C). Cook in batches if necessary.
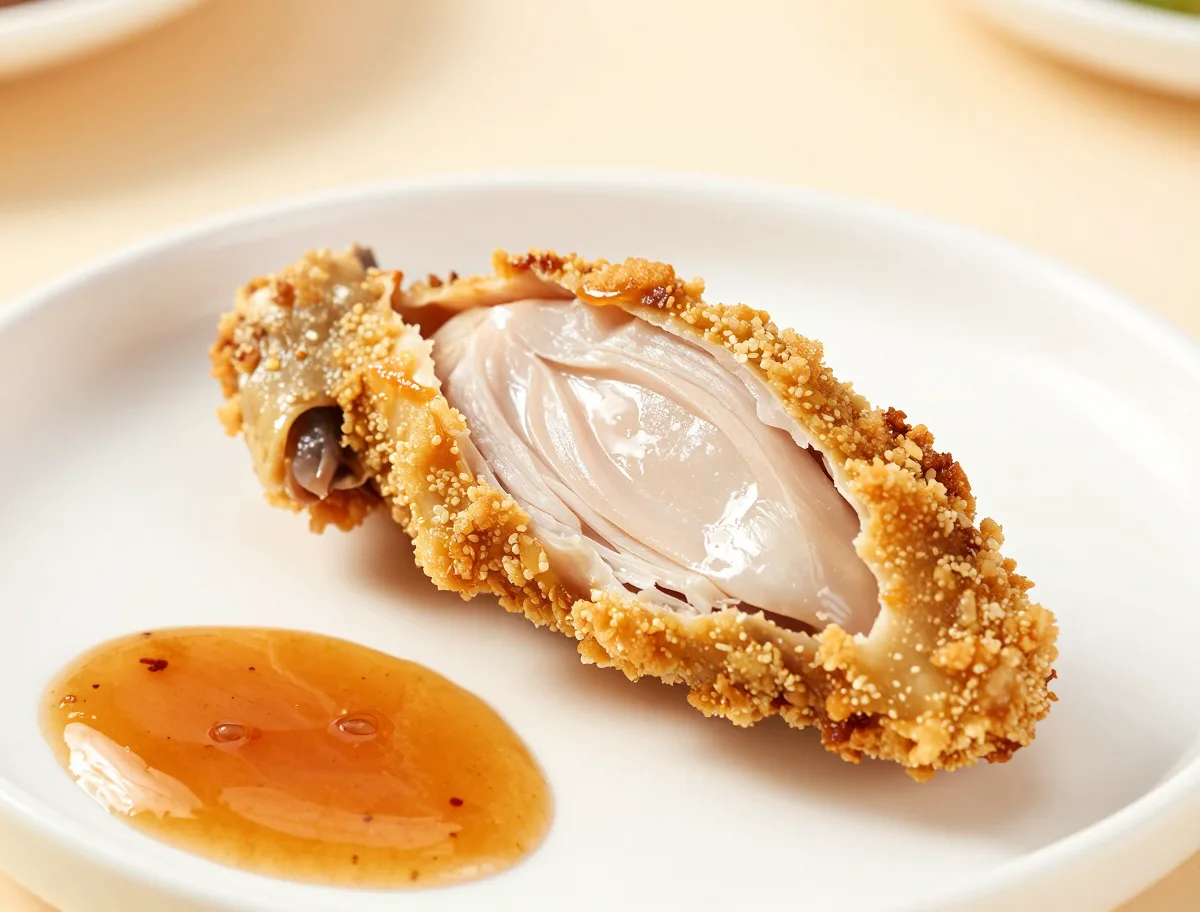
How to Tell When the Tenders Are Done
Timing is a guide because tenderloins differ in thickness and appliances vary. Start checking the largest piece near the early end of the cooking range, looking for a dry, rigid crust and a moist, opaque center.
- Insert the thermometer sideways into the thickest center of the largest tender, avoiding the rack.
- Chicken is safe when it reaches 165°F (74°C); color alone is not a reliable safety test.
- The sauce is ready when it lightly coats a spoon and still flows. If reduced to a sticky mass, it will overpower and soften the coating.
Doneness Cues
- The panko coating is golden at the edges and feels firm rather than damp.
- The chicken is opaque and moist in the center, not translucent or stringy.
- The thickest portion of the largest tender registers 165°F (74°C).
- The sauce is glossy and flows slowly, leaving a brief trail when stirred.
The Variables That Make Panko Crisp
Crispness comes from driving moisture out of the coating faster than steam can soften it. Even thickness, exposed surface area, circulating heat, and a little oil all support that process.
- Crowding creates a humid pocket around the chicken and lowers browning, so use batches when needed.
- Thick pieces may need more time to reach 165°F, while thin pieces can dry out; consistent sizing narrows that gap.
- Oil helps transfer heat to the panko. Completely dry crumbs often stay pale and can taste chalky.
- Sweet sauces brown quickly, which is why this recipe reduces the sauce separately instead of baking it onto the chicken.
For additional technique context on improving air-fryer crispness, see America’s Test Kitchen’s air-fryer crispness guidance.
Common Asian Chicken Tender Problems and Fixes
Most texture problems are caused by moisture or timing rather than the sauce itself. The following checks address the issues most likely to arise in an oven-baked batch.
- Soft underside: Use a rack, increase the space between pieces, and serve the tenders uncovered. A wet pan or stacked chicken traps steam.
- Pale crumbs: Confirm that the oven is fully heated and that the panko was evenly coated with oil. Turn the chicken for more even exposure.
- Coating sliding off: Pat the chicken dry, shake off excess egg, and press the crumbs on. Avoid moving the pieces until the crust has begun to set.
- Dry chicken: Check the largest tender early and remove the batch as soon as the thickest piece reaches 165°F.
- Crisp chicken becoming soft: The sauce has added moisture. Serve it as a dip or apply only a thin coating at the table.
Easy Substitutions for Chicken, Panko, and Soy Sauce
The recipe is flexible as long as substitutions respect the balance between a dry coating, a wet binder, and a salty-sweet sauce. Expect small changes in texture or flavor when replacing the core ingredients.
- Use boneless skinless chicken breast cut into evenly sized strips in place of tenderloins.
- For gluten-free tenders, use certified gluten-free panko, a gluten-free flour blend, and certified gluten-free tamari or soy sauce.
- Regular breadcrumbs can replace panko, but the crust will be finer and denser.
- Rice flour can replace all-purpose flour for a gluten-free coating; cornstarch alone makes a more delicate crust.
- Maple syrup can replace honey, though the sauce will be thinner and more aromatic. Coconut aminos can replace soy sauce, but usually need less honey because they are sweeter.
- Replace sriracha with chili-garlic sauce or red pepper flakes, adjusting for the different moisture and heat levels.
Flavor Variations for the Same Crispy Chicken Base
Keep the breaded tender format and change only the sauce direction to create a different takeout-inspired profile. Make every variation separately and add it after cooking so the coating remains intact.
- Teriyaki-style: Replace the sauce with a reduction built around soy sauce, honey, ginger, and garlic; keep it thin enough to dip.
- Hoisin-sesame: Stir hoisin into the sauce base and reduce the honey because hoisin is already sweet and concentrated.
- Sesame-ginger: Omit the sriracha, increase the ginger slightly, and finish with extra sesame seeds.
- Garlic-chili: Increase the chili sauce and garlic while reducing the honey slightly for a sharper, hotter finish.
- Lighter version: Use a restrained oil mist and serve all the sauce on the side, recognizing that the crust will be less rich than a fried version.
What to Serve with Asian Chicken Strips
Serve the tenders hot and uncovered as soon as they are sauced or plated. A separate bowl of sauce keeps the crust crisp while allowing each diner to control the sweetness and heat.
- Pair with steamed rice or rice noodles to absorb the savory sauce.
- Add steamed broccoli, green beans, cucumber salad, or a crisp slaw for freshness and contrast.
- Green onions and sesame seeds provide aroma and texture without making the coating wet.
- For a casual appetizer, cut the tenders into smaller pieces and serve with toothpicks and the sauce for dipping.
How to Store, Freeze, and Reheat the Tenders
Store the chicken and sauce separately. This protects the breading from absorbing liquid during chilling and gives you the best chance of restoring some crispness when reheating.
- Refrigerate cooked chicken and sauce in separate shallow containers within 2 hours. Use refrigerated leftovers within 3 to 4 days.
- Reheat the tenders uncovered in a 375°F oven or air fryer until crisp and heated to 165°F throughout. A microwave is faster but will soften the coating.
- Freeze cooked tenders in airtight packaging for longer storage, understanding that the crust will not be quite as crisp after thawing and reheating.
- For make-ahead preparation, bread uncooked tenders, freeze them in a single layer until firm, then transfer them to airtight packaging. Cook from frozen with additional time and verify 165°F in the thickest piece.
- Do not freeze or store the sauce on the breaded chicken if preserving texture is important.
Asian Chicken Tenders FAQ
These quick answers cover the most common decisions involved in getting crisp, juicy tenders and keeping the sauce balanced.
What does Asian-style mean in this recipe?
It describes a broad fusion-style flavor profile built from soy sauce, honey, garlic, ginger, rice vinegar, sesame oil, and chili. It is not presented as a traditional dish from one specific Asian region.
Can I use chicken breast instead of tenderloins?
Yes. Cut boneless skinless chicken breast into strips about 3/4 inch thick and keep the pieces as uniform as possible so they finish together.
Should I toss the chicken in the sauce?
For the crispest result, serve the sauce for dipping. You can brush on a thin layer immediately before eating, but prolonged tossing will soften the panko.
Why are my chicken tenders not crispy?
Check that the chicken was patted dry, the panko received a light coating of oil, the pieces were spaced apart, and the oven or air fryer was fully preheated. Saucing too early also causes the crust to soften.
Can I make these in an air fryer?
Yes. Cook the tenders in a single layer at 400°F (205°C) for about 10 to 14 minutes, turning halfway. Basket airflow and chicken thickness vary, so use 165°F (74°C) as the endpoint.
How spicy are these sweet and spicy chicken tenders?
The listed sriracha gives moderate background heat. Reduce it for a milder batch or add more after tasting the sauce; prepared chili sauces vary considerably in intensity.
How do I make the recipe gluten-free?
Use certified gluten-free panko, a gluten-free flour blend or rice flour, and certified gluten-free tamari or soy sauce. Check the labels on the chili sauce as well.
How do I lower the sodium?
Use low-sodium soy sauce, do not add extra salt to the coating, and taste the finished sauce before adjusting it. Other prepared sauces may contain more sodium than their flavor suggests.
Safe Handling and Cooking Temperature
Keep raw chicken, its packaging, and any utensils that touch it away from ready-to-eat food. Wash hands and clean boards, bowls, and surfaces after breading, and use a clean utensil for the cooked chicken and sauce.
- Cook every tender to at least 165°F (74°C), measured in the thickest part with a food thermometer.
- Do not judge safety by crumb color, clear juices, or the timer alone; breading can brown before the center is cooked.
- Refrigerate leftovers within 2 hours, or within 1 hour if the ambient temperature is above 90°F. Use them within 3 to 4 days or freeze them.
- Reheat leftovers to 165°F throughout.
- This recipe uses a separately prepared sauce. Do not reuse liquid that has contacted raw chicken unless it is brought to a full boil first.
For authoritative poultry cooking and leftover-reheating guidance, consult the USDA safe cooking temperature chart.