Chicken Curry Recipe Without Coconut Milk
This Indian-style chicken curry uses a deeply cooked onion-tomato masala, warm spices, and tangy yogurt for a rich, spoonable gravy—without coconut milk.
What to Expect from This Coconut-Free Chicken Curry
This is an Indian-style, tomato-based chicken curry rather than a coconut curry with an ingredient simply omitted. The sauce gains depth from browned chicken, softened onion, cooked tomato, and bloomed spices, then gets a tangy, creamy finish from yogurt.
- The finished gravy should be spoonable and glossy, thick enough to cling to the chicken but loose enough to soak into rice or coat flatbread.
- Boneless chicken thighs provide a reliable balance of tenderness, cooking speed, and flavor.
- The recipe is coconut-free but not dairy-free as written because it uses yogurt.
Why the Onion-Tomato Masala Works Without Coconut Milk
Coconut milk is not required for a full-bodied curry. Here, onion supplies sweetness and structure, while tomatoes provide acidity, color, and moisture that can be concentrated through cooking. Oil carries the aromas of the spices, and chicken thighs contribute richness as they simmer.
- Ginger and garlic create the aromatic foundation; they should be cooked briefly after the onion so they become fragrant without scorching.
- Coriander and cumin bring earthy warmth, turmeric adds color, chili or paprika controls heat, and garam masala is reserved for a late aromatic lift.
- Tomato paste intensifies the masala, but it works alongside crushed tomatoes rather than replacing their liquid.
- Full-fat yogurt adds both tang and creaminess, unlike heavy cream, which would provide richness with little acidity.
Ingredients
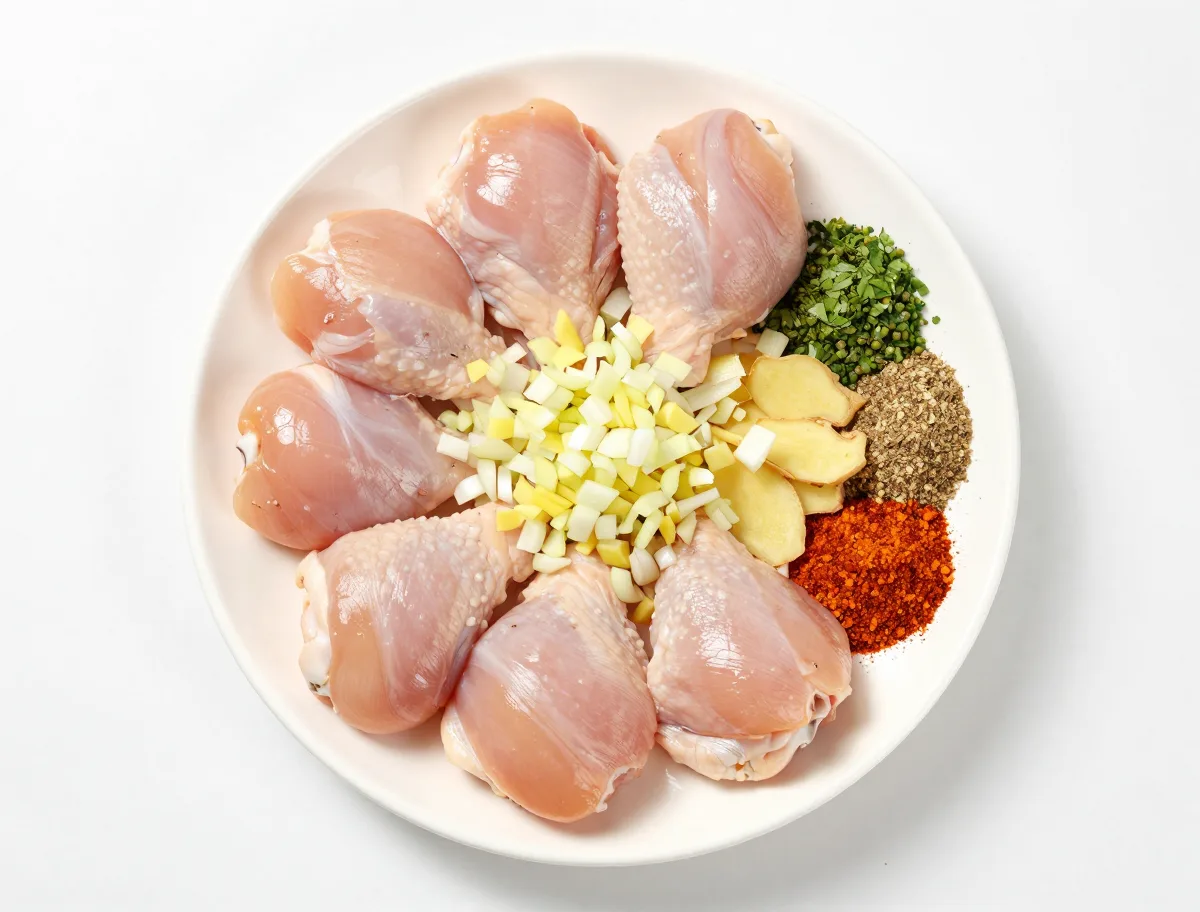
- 1 3/4 pounds boneless, skinless chicken thighs, cut into 1 1/2-inch pieces
- 1 1/2 teaspoons kosher salt, divided
- 3 tablespoons neutral oil
- 1 large yellow onion, finely chopped
- 1 tablespoon fresh ginger, finely grated
- 5 cloves garlic, finely grated or minced
- 2 teaspoons ground coriander
- 1 teaspoon ground cumin
- 1 teaspoon ground turmeric
- 1/2 teaspoon Kashmiri chili powder or sweet paprika, use chili powder for more heat
- 1 tablespoon tomato paste
- 1 (14 1/2-ounce) can crushed tomatoes
- 1 cup unsalted chicken stock
- 1/2 teaspoon garam masala
- 1/2 cup full-fat plain yogurt, whisked smooth
- 1/2 small lemon, cut into wedges
- 1/4 cup fresh cilantro, chopped
How to Build the Curry’s Flavor
The important technique is sequencing. Develop the onion-tomato base before adding the stock, and use only a gentle simmer once the chicken goes back into the pan. This gives the masala time to concentrate without forcing the chicken to cook in a thin, under-seasoned liquid.
- Brown the chicken in batches if the pan is crowded; otherwise, it will steam and release enough moisture to interfere with browning.
- Cook the tomato mixture until it visibly thickens and loses its raw aroma. Adding stock too early produces a thinner, flatter curry.
- Keep the lid on while the chicken cooks, then remove it for the final reduction so you can control the gravy.
- Temper yogurt with hot gravy before adding it to the pan, and never boil the curry after the yogurt goes in.
Instructions
- Season the chicken: Pat the chicken dry and toss it with 1 teaspoon of the salt. Set the remaining 1/2 teaspoon salt aside for the sauce.
- Brown the chicken: Heat the oil in a wide Dutch oven or deep skillet over medium-high heat. Add the chicken in a single layer, working in batches if necessary, and brown for about 2 minutes per side. The chicken need not be cooked through. Transfer it to a plate.
- Cook the onion: Reduce the heat to medium. Add the onion to the same pan and cook, stirring often, until softened and lightly golden. Scrape up any browned bits as the onion releases moisture.
- Build the masala: Stir in the ginger and garlic and cook until fragrant. Add the coriander, cumin, turmeric, chili powder or paprika, and tomato paste. Stir constantly for about 45 seconds, just until the spices are aromatic and the paste darkens slightly.
- Cook the tomato base: Add the crushed tomatoes and the reserved 1/2 teaspoon salt. Cook uncovered, stirring occasionally, until the mixture thickens and no longer smells raw; the spoon should briefly expose the bottom of the pan when drawn through it.
- Simmer the curry: Return the chicken and any juices to the pan. Stir in the stock, bring the curry just to a gentle simmer, then cover and cook until the chicken is tender and reaches at least 165°F (74°C) in the thickest piece.
- Reduce the gravy: Remove the lid and simmer gently until the gravy thickens enough to coat the chicken. Stir in the garam masala during the final minute. If the curry becomes thicker than you prefer, loosen it with a small amount of hot stock.
- Add the yogurt and finish: Reduce the heat to low. Whisk several spoonfuls of the hot gravy into the yogurt, one spoonful at a time, then stir the tempered yogurt into the pan. Warm gently for 1 to 2 minutes without allowing the curry to boil. Remove from the heat, squeeze in lemon juice to taste, and scatter with cilantro.
- Rest and serve: Let the curry rest for 5 minutes so the gravy can settle and thicken slightly. Taste and adjust the balance with additional lemon or salt if needed.
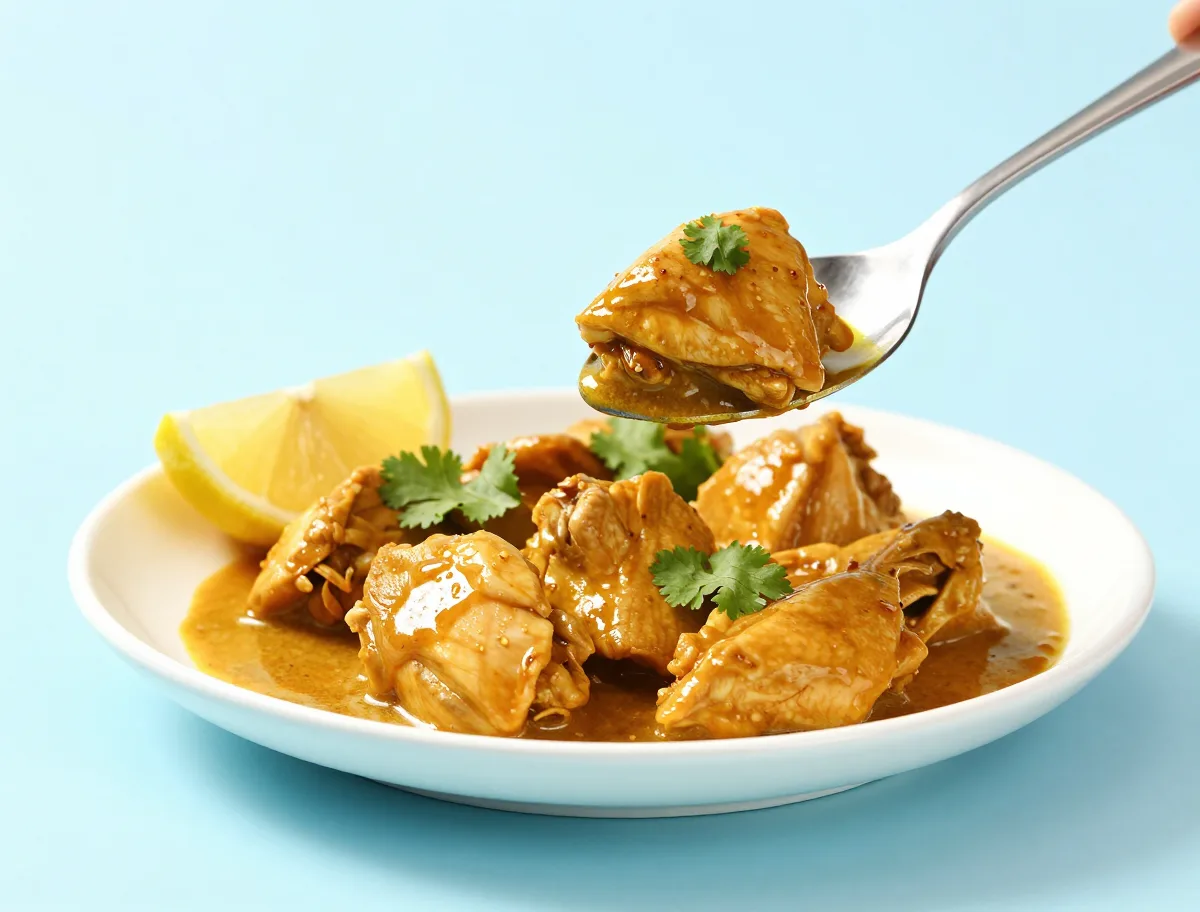
How to Tell When the Chicken Curry Is Ready
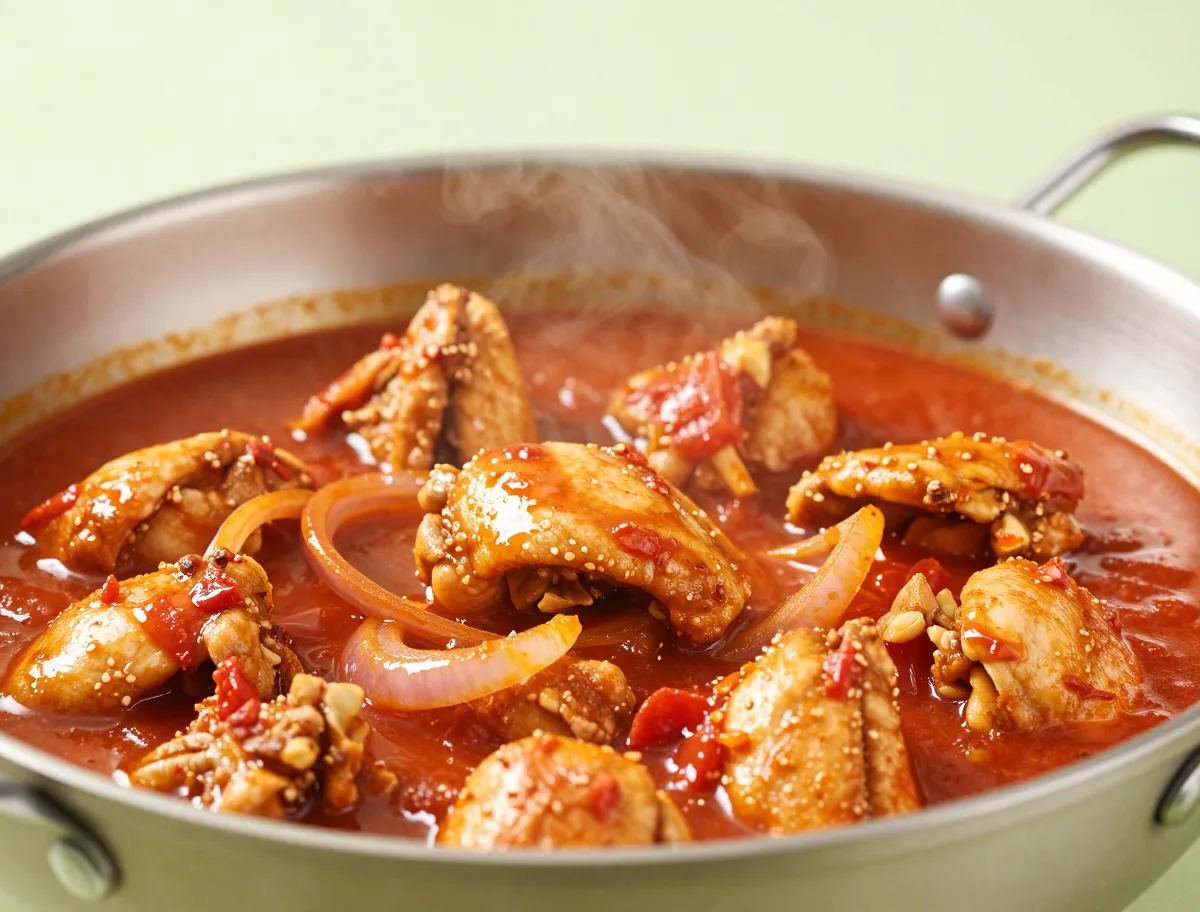
Timing is a guide, but the pan itself provides better clues. The masala should look integrated rather than watery, and the sauce should leave a brief track when a spoon is drawn through it. The chicken should be tender, not merely opaque.
- Check the thickest chicken piece with an instant-read thermometer; poultry must reach 165°F (74°C).
- If the chicken is safe but still feels firm, continue cooking it gently in the gravy rather than raising the heat.
- After a five-minute rest, the sauce should cling lightly to the chicken and thicken a little more.
- A small amount of oil glistening at the edges is acceptable, but complete oil separation is not required for a successful curry.
Doneness cues
- The cooked onion is soft and lightly golden rather than crisp or sharply raw.
- The tomato masala is thick, cohesive, and free of a raw tomato aroma before the stock is added.
- The gravy coats the chicken and flows slowly; it should not resemble thin broth.
- The chicken is tender and measures at least 165°F (74°C) in the thickest piece.
- The yogurt remains smooth because it is tempered and warmed without a hard boil.
The Cooking Variables That Control the Gravy
This recipe depends on moisture control and moderate heat. Reduction concentrates the tomato, onion, spices, and salt, while covered simmering allows the chicken to cook in a moist environment. The two stages should not be treated the same way.
- A wide pan evaporates liquid more quickly than a narrow saucepan, so begin checking the gravy early if using a broad skillet.
- Keep the curry covered while the chicken cooks to prevent excessive evaporation, then uncover it to concentrate the sauce.
- Yogurt proteins are sensitive to sudden heat and acidity. Tempering reduces the temperature shock, and low heat prevents curdling.
- Season lightly before reduction and make the final salt adjustment only after the gravy has reached its intended consistency.
Common Chicken Curry Mistakes and How to Fix Them
Most problems come from rushing the masala or using too much heat. Taste and inspect the sauce before making corrections; adding more dry spices rarely fixes a base that has not been cooked properly.
- Watery gravy: Simmer uncovered until it coats a spoon. Adjust salt only after the extra liquid has reduced.
- Flat or raw flavor: Continue cooking the onion-tomato mixture before adding more liquid. Raw spices added late can taste harsh.
- Burnt spices: Move the unburned curry to a clean pan without scraping the scorched layer from the bottom.
- Tough chicken: Maintain a gentle simmer and cook until tender. Aggressive boiling can tighten the meat and evaporate the sauce too quickly.
- Curdled yogurt: This is usually caused by adding cold yogurt to a boiling sauce. Temper it and keep the finished curry below a boil.
- Over-thick or salty curry: Stir in unsalted hot stock a tablespoon or two at a time, then retaste.
Coconut Milk Substitutes for Chicken Curry
There is no universal one-for-one replacement for coconut milk because it contributes liquid, fat, sweetness, and body at the same time. Choose a substitute according to the result you want rather than swapping equal volumes automatically.
- For tangy Indian-style creaminess, use full-fat plain yogurt as in the recipe. Greek yogurt is thicker and may need loosening with a little stock before tempering.
- For a smoother, milder finish, replace the yogurt with heavy cream added near the end; it will be richer and less tangy.
- For a lighter dairy-free curry, omit the yogurt and use the tomato-onion reduction with stock. Reduce a little longer if needed.
- For dairy-free richness, unsweetened cashew cream or blended silken tofu can be stirred in at the end. Cashew cream is not suitable for people with tree-nut allergies.
- Ghee can replace the oil for flavor, but use oil if the curry must be dairy-free.
Easy Variations That Keep the Curry’s Identity
The core onion, tomato, spice, and chicken framework can support several useful variations without turning into an unrelated dish. Change the source of richness or the heat level while keeping the gravy balanced.
- Tomato-forward dairy-free version: Omit the yogurt and simmer the curry uncovered slightly longer for a concentrated gravy.
- Cream-finished version: Stir in 1/3 cup heavy cream after the chicken is tender, warming it gently instead of boiling.
- Curry-powder shortcut: Replace the measured ground spices with 2 teaspoons of a salt-free curry powder, then taste carefully because commercial blends vary.
- Spicier version: Use chili powder instead of paprika and finish with additional chili only after tasting the cooked sauce.
- Lighter broth-based version: Use the stock-based tomato gravy without dairy and serve it with rice so the extra sauce remains part of the meal.
What to Serve with No-Coconut Chicken Curry
The gravy is meant to be part of every bite, so pair the curry with a neutral starch that can absorb and carry it. Let the curry rest briefly before serving, then add fresh contrast rather than another heavily spiced main dish.
- Serve with steamed basmati rice, jeera rice, naan, roti, or chapati.
- Use cilantro and lemon in moderation to brighten the tomato-rich sauce.
- For a spicy meal, add a cucumber salad or raita. A dairy-free cucumber-herb salad is a suitable alternative when needed.
- Warm the serving bowls or plates if possible; the sauce thickens as it cools.
How to Store, Freeze, and Reheat Chicken Curry
The curry can be made ahead, and its flavor often becomes more integrated after resting. Storage quality depends on cooling promptly and reheating gently; yogurt-based sauce may become slightly grainy or release liquid after freezing even when handled safely.
- Refrigerate leftovers in shallow containers within 2 hours, or within 1 hour if the surrounding temperature is above 90°F (32°C).
- Keep refrigerated curry at 40°F (4°C) or below and use it within 3 to 4 days.
- Freeze in airtight, portion-sized containers for best quality within 2 to 3 months. Tomato-forward or cream-finished versions generally tolerate freezing better than yogurt-heavy versions.
- Reheat only the amount needed, covered over low heat with a splash of stock if necessary, stirring until the center reaches 165°F (74°C).
- Thaw frozen curry in the refrigerator or reheat it directly from frozen, allowing extra time and stirring to eliminate cold spots.
For practical guidance on cooling, refrigerating, freezing, and reheating leftovers, see Cornell Cooperative Extension’s leftovers and food safety guidance.
Chicken Curry Without Coconut Milk: Your Questions Answered
These answers distinguish between replacing coconut milk’s liquid, richness, tang, and creamy body. The right option depends on both your dietary needs and the style of curry you want.
Can chicken curry be made without coconut milk?
Yes. A properly cooked onion-tomato masala with stock or water makes a complete, flavorful curry without coconut. Yogurt, cream, or a dairy-free puree can be added for extra body, but none is essential.
What is the best substitute for coconut milk in chicken curry?
For tang and Indian-style creaminess, full-fat yogurt is a strong choice. Heavy cream gives a smoother, milder richness; stock gives a lighter tomato-based sauce; and cashew cream or silken tofu can add dairy-free body. These options are not identical in flavor or texture.
Will this curry still be creamy without coconut milk?
Yes. The cooked onion and reduced tomato provide natural body, while the yogurt in this recipe adds a smooth, tangy finish. For a dairy-free version, rely on further reduction or use cashew cream or blended silken tofu.
Is this an Indian-style or Thai-style curry?
It is an Indian-style curry built around an onion-tomato masala and spices such as coriander, cumin, turmeric, and garam masala. It is not intended to imitate a Thai curry, whose flavor structure commonly relies on curry paste and coconut milk.
Which chicken cut works best?
Boneless, skinless thighs are the most forgiving and stay tender during simmering. Bone-in thighs can be used but need more time and may require additional stock. Chicken breast works, but it cooks faster and is less tolerant of overcooking.
How do I keep the gravy from becoming thin?
Cook the onion and tomato thoroughly before adding stock, use a measured amount of liquid, and finish the curry uncovered. Reduce first, then decide whether it needs yogurt, cream, or another body-building ingredient.
Can I make this chicken curry dairy-free as well as coconut-free?
Yes. Use oil, omit the yogurt, and build body through the tomato-onion reduction. For a richer result, use unsweetened cashew cream or blended silken tofu, checking labels on stock and spice blends for allergens or hidden dairy.
Can I use curry powder instead of the individual spices?
Yes, as a convenience option. Start with about 2 teaspoons of salt-free curry powder, but check the package because blends differ widely in chili, salt, and dominant spices. The finished curry may taste less specifically Indian-style than the measured blend in this recipe.
Chicken and Leftover Safety
Handle the raw chicken and its juices separately from garnishes, cooked rice, and serving utensils. A thermometer is more reliable than color, timing, or the appearance of bubbling gravy.
- Cook chicken to a minimum internal temperature of 165°F (73.9°C), measured in the thickest piece without touching bone.
- Wash hands, utensils, and work surfaces after they contact raw chicken.
- Refrigerate leftovers within 2 hours, or within 1 hour when the surrounding temperature exceeds 90°F (32°C).
- Reheat leftovers to 165°F (73.9°C) throughout, stirring during stovetop or microwave reheating to prevent cold spots.
- Additional gentle cooking may improve thigh tenderness, but it does not replace checking the safety temperature.
For authoritative poultry cooking and leftover reheating temperatures, consult the USDA safe cooking temperature guidance.
Recipe Notes
- Chicken thighs are the most forgiving choice here. If using boneless chicken breast, cut it into larger pieces and begin checking it earlier to avoid overcooking.
- For a hotter curry, use the chili powder rather than paprika and add a little more after tasting; commercial curry powders vary in salt, heat, and flavor.
- The yogurt supplies tang and body, but the onion-tomato reduction is the main source of the curry’s thickness and flavor.
- Serve with basmati rice, naan, roti, or chapati.