Bag Chicken Recipe: Juicy Chicken in an Oven Bag
This easy bag chicken recipe roasts bone-in chicken, potatoes, carrots, onion, and garlic in an oven-rated cooking bag for juicy meat, tender vegetables, flavorful pan juices, and remarkably easy cleanup.
What This Oven-Bag Chicken Recipe Is
Here, “bag chicken” means chicken roasted inside a commercially produced, oven-rated cooking bag set in a deep roasting pan. The enclosed bag holds in steam and rendered juices, giving you tender chicken, soft-to-tender vegetables, and a useful pool of savory juices with very little cleanup.
- Use a bag specifically labeled for oven cooking; ordinary paper and plastic bags are unsafe.
- The default result is juicy and moist, with browned but generally soft skin.
- This is different from brown-paper-bag roasting, foil packets, parchment packets, sous vide, and slow-cooker liners.
Why the Ingredients Work
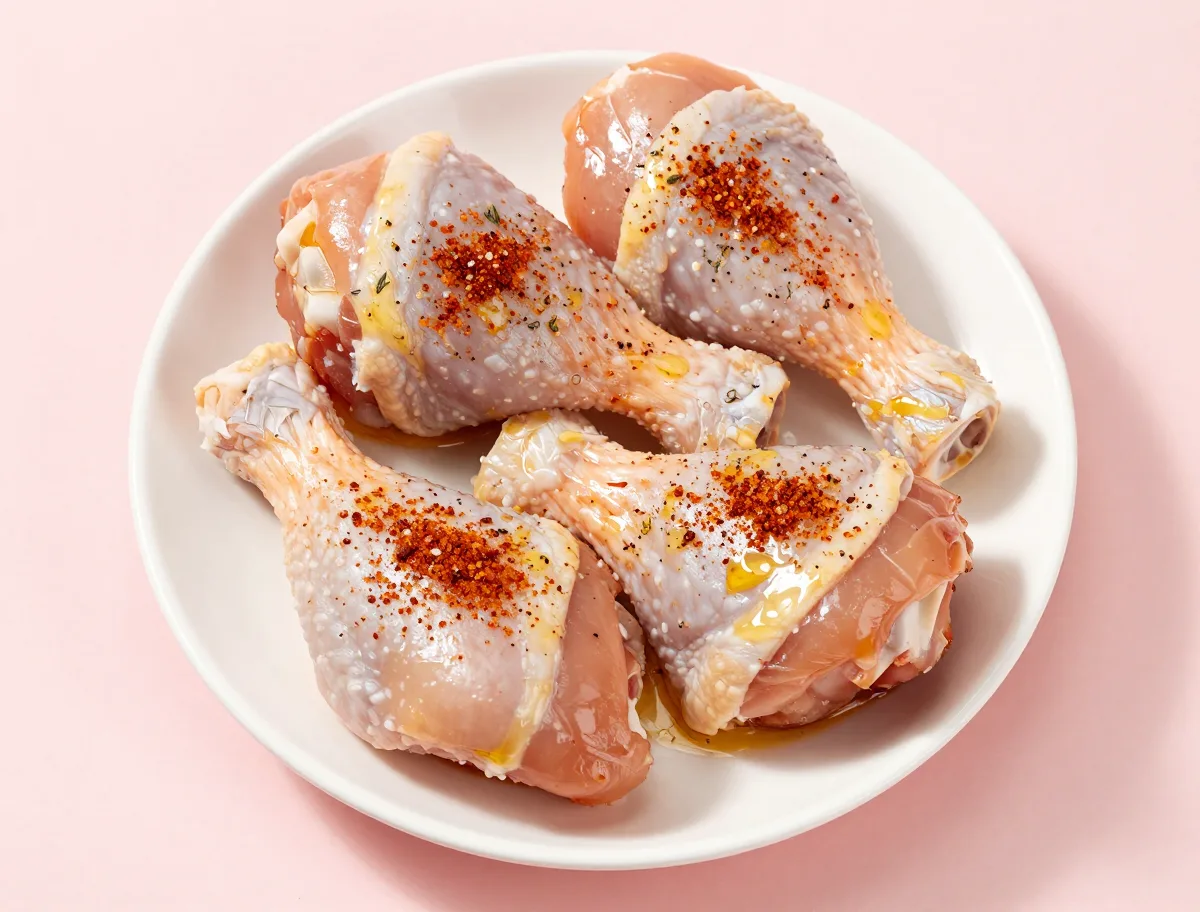
Bone-in, skin-on thighs and drumsticks are especially well suited to enclosed roasting because they stay moist and tolerate a little extra cooking better than lean boneless breast. Potatoes, carrots, onion, and garlic are sturdy enough to cook alongside the chicken while absorbing its seasoned juices.
- Olive oil helps the spice mixture adhere and encourages surface color without adding excess liquid.
- Paprika, thyme, garlic, and onion create savory roast-chicken flavor without relying on a packaged soup mix.
- A small amount of flour is included only when the selected bag’s instructions require it; it helps manage released juices and can lightly thicken them.
- Water provides a modest amount of moisture, while the chicken and vegetables supply most of the liquid in the bag.
- 3 pounds bone-in, skin-on chicken thighs and drumsticks, about 6 pieces, patted dry
- 1 tablespoon all-purpose flour, or a flour alternative specifically approved by the bag manufacturer
- 1 1/2 teaspoons kosher salt
- 1 teaspoon sweet paprika
- 1 teaspoon dried thyme
- 1/2 teaspoon black pepper, freshly ground
- 2 tablespoons olive oil
- 1 pound baby potatoes, halved, or quartered if large
- 4 medium carrots, peeled and cut into 1-inch chunks
- 1 medium yellow onion, cut into 8 wedges
- 4 cloves garlic, lightly crushed
- 1/2 cup water
- 1 large oven-rated cooking bag, with its supplied tie
How to Make Chicken in an Oven Bag
The most important preparation choice is to put the bag in its roasting pan before filling it. Once loaded, it can be awkward and dangerous to lift. Keep the vegetables in a relatively even layer, leave expansion room above the food, and use only the supplied closure.
- Follow the package directions for whether flour is required and for the exact vent size and placement.
- The bag should rest in the pan rather than hang over the sides.
- A thermometer is essential because chicken size, starting temperature, vegetable load, and oven calibration all affect the timing.
- Open the finished bag in the pan; do not carry a swollen bag filled with hot liquid.
- Heat the oven and prepare the pan: Heat the oven to 350°F (175°C), provided this temperature is within the limit printed on your oven bag. Set the unopened bag in a deep roasting pan at least 2 inches deep. Keep the pan away from the oven walls, racks, and heating elements.
- Season the chicken: Combine the kosher salt, paprika, dried thyme, and black pepper. Rub the chicken with the olive oil, then coat it evenly with the seasoning mixture.
- Add the bag coating and vegetables: Open the cooking bag according to its package directions. Add the flour only if the bag manufacturer calls for it, then shake the bag to distribute it. Add the potatoes, carrots, onion, garlic, and water. Arrange the vegetables in an even layer and place the seasoned chicken on top, leaving room for the bag to expand.
- Seal and vent the bag: Gather the bag’s opening and secure it with the supplied tie; do not use string, plastic wrap, or another improvised closure. Tuck excess bag material into the pan. Cut the number and size of vents specified on the package, commonly several small slits near the top. Make sure the bag does not touch the oven walls, rack, or any heating element.
- Roast until the chicken is cooked: Roast for about 50 to 65 minutes, rotating the pan once if needed for even cooking. Begin checking the thickest chicken piece at 50 minutes. Insert an instant-read thermometer into the thickest part without touching bone; every piece must reach at least 165°F (74°C). Check more than one piece if their sizes differ.
- Open the bag safely: Leave the pan on a heatproof surface for 5 minutes. Keeping the bag in the pan, cut across the top with kitchen shears and open it away from your face and hands so steam escapes away from you. Transfer the chicken and vegetables to a serving platter, spooning over some of the pan juices.
- Rest before serving: Let the chicken rest for another 5 minutes before serving. The vegetables should yield easily to a fork while retaining their shape.
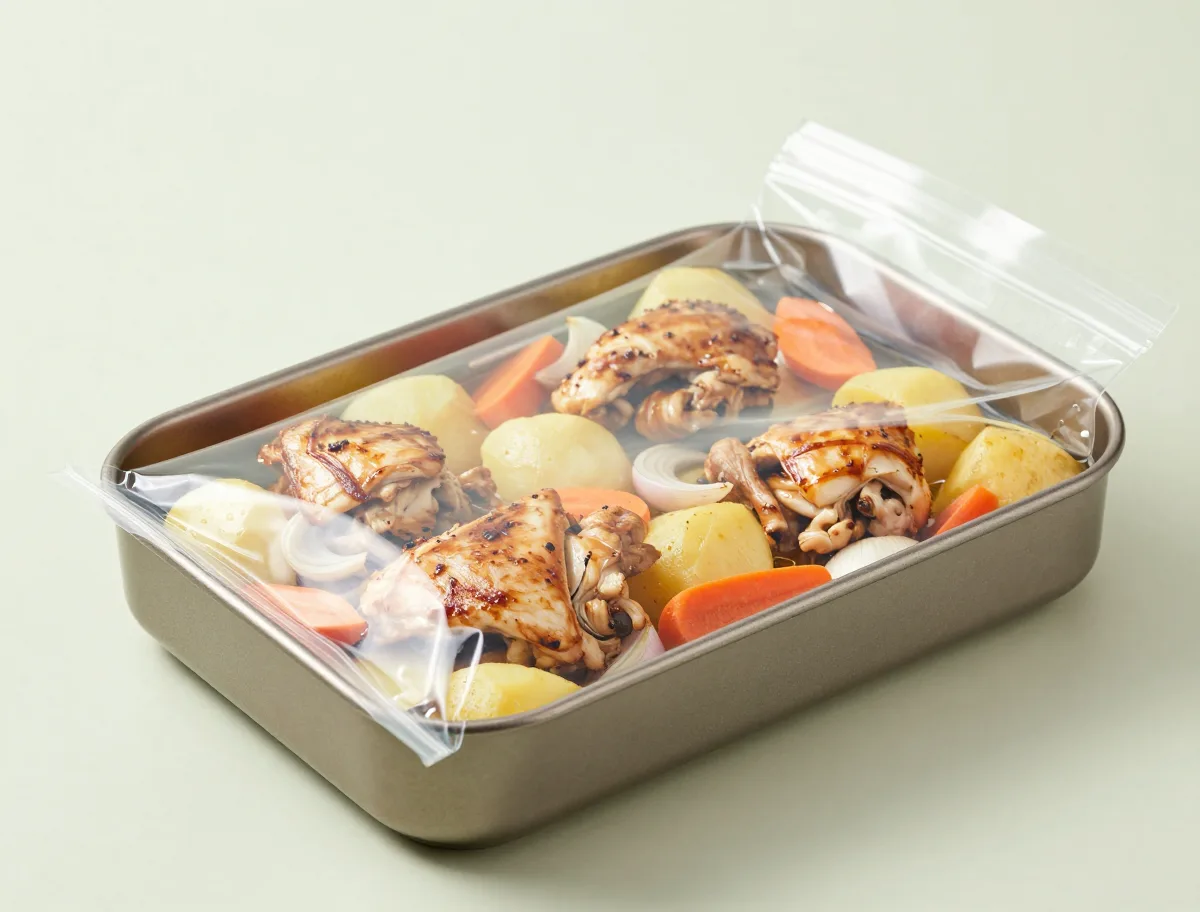
For bag preparation, venting, pan depth, clearance, and handling details, follow the manufacturer’s guidance for roasting chicken in an oven bag in addition to the directions printed on your selected bag.
How to Tell When the Bag Chicken Is Done
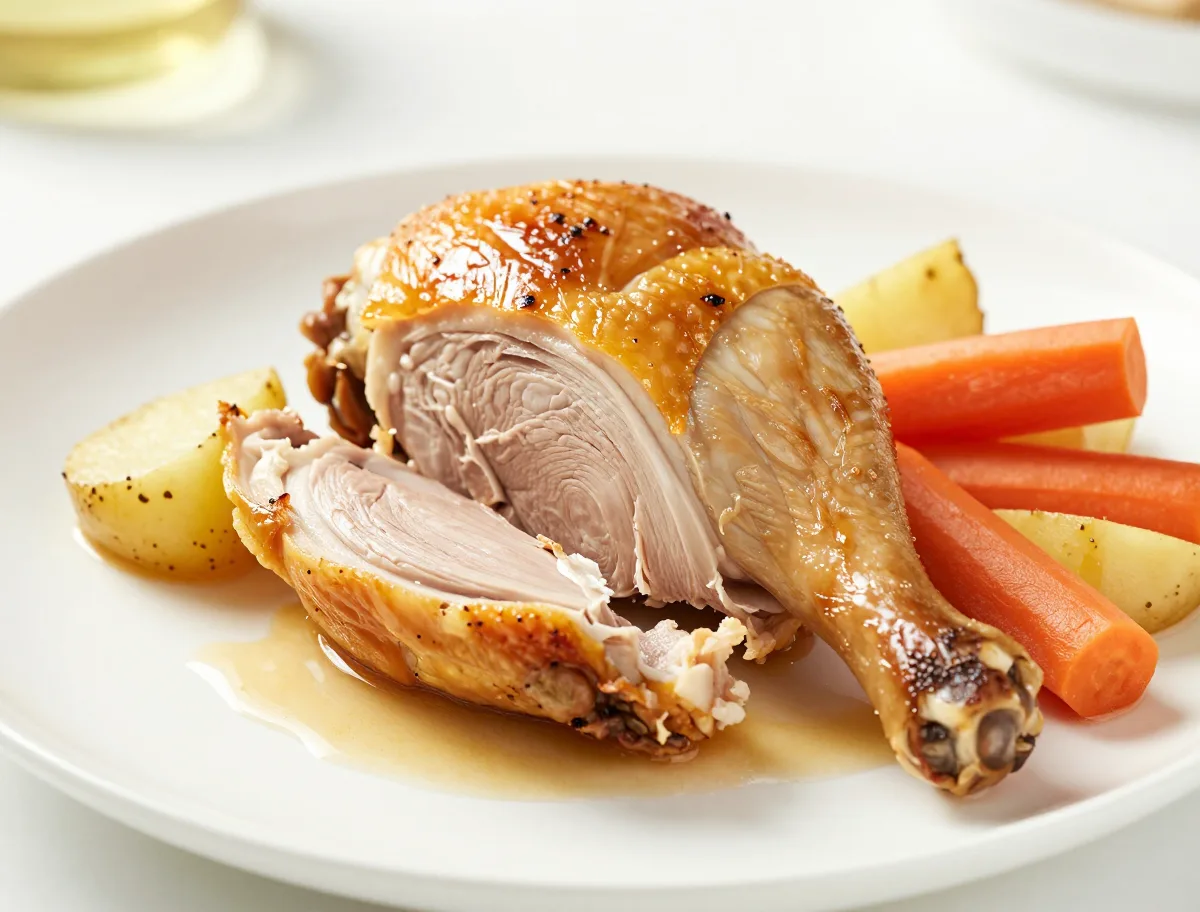
Color and cooking time are useful estimates, but neither confirms safe doneness. Test the thickest part of the largest chicken piece with an instant-read thermometer, avoiding the bone. If the pieces vary in size, check more than one.
- Chicken is safe at a minimum internal temperature of 165°F (74°C).
- Potatoes and carrots should be tender when pierced but should still hold their shape.
- The skin may be golden and moist rather than crackling because steam remains inside the bag.
- If the chicken is done before the vegetables, transfer the chicken to a covered platter and continue the vegetables separately until tender.
The thickest part of every chicken piece should reach at least 165°F (74°C), measured away from the bone. The meat should be opaque, the juices in the bag plentiful, and the potatoes and carrots fork-tender but not collapsing. The skin will be browned and moist rather than conventionally crisp.
Why Roasting Chicken in a Bag Keeps It Moist
An oven bag creates a humid cooking environment. Moisture released from the chicken and vegetables becomes steam, then condenses and returns as liquid. That reduces evaporation from the meat, which is why this method is forgiving and juicy.
- The same trapped moisture that protects the chicken also limits surface drying, so crisp skin is not the bag’s strongest feature.
- The bag needs space to expand; overfilling can block heat circulation and increase the risk of leaking or rupturing.
- Vents release some steam in a controlled way. Too few, blocked, or omitted vents can cause excessive swelling, while improvised large openings reduce the moist-roasting advantage.
- A moderate oven temperature and strict adherence to the bag’s maximum temperature are more important than transferring times from an uncovered roasting recipe.
Common Oven-Bag Chicken Mistakes and Fixes
Most problems come from treating an oven bag like ordinary cookware. The material, closure, venting, pan, and appliance all matter. If a bag melts, scorches, or touches a heating element, turn off the oven and do not attempt to continue using the compromised bag.
- Bag splits or leaks: The bag may be overfilled, under-vented, missing the required flour, or touching an oven surface. Use a larger approved bag, follow the label, and leave clearance.
- Chicken is undercooked: Large pieces, a crowded bag, a whole bird, or a cool oven can extend the cooking time. Continue cooking and recheck the thickest portion with a thermometer.
- Skin is pale or soft: This is a normal effect of steam, not proof that the chicken is raw. Remove the chicken from the bag and use a separate dry-heat finish if browning matters.
- Vegetables are firm: They may be too large or packed too densely. Remove the cooked chicken and continue the vegetables in a suitable pan.
- Juices are thin: The bag retains substantial moisture. Spoon off excess liquid and reduce it separately in a saucepan if a more concentrated sauce is wanted.
Ingredient Substitutions for Bag Chicken
The seasonings and vegetables are flexible, but substitutions should preserve the method’s basic balance: sturdy vegetables, moderate moisture, and chicken pieces with reasonably similar cooking times.
- Bone-in thighs or drumsticks can replace the mixed pieces. Boneless breasts may be used, but they cook faster and should be checked early to prevent drying.
- Parsnips, sweet potatoes, or other firm winter vegetables can replace some of the potatoes or carrots when cut into similar-size pieces.
- Neutral oil or melted butter can replace the olive oil.
- Dried rosemary, oregano, or an unsalted poultry seasoning can replace the thyme, but salty seasoning blends require reducing the added salt.
- Use cornstarch, rice flour, potato flour, or another substitute only if the bag manufacturer specifically permits it.
Ways to Adapt This Chicken Roasting Bag Recipe
This formula can shift from a chicken-and-vegetable dinner to a simpler chicken-only roast, but the cut and food load determine the timing. Keep each version within the limits of the oven bag and verify every portion with a thermometer.
- For a whole chicken, use a bag large enough for the bird and vegetables, do not stuff the cavity, and expect a substantially different cooking time based on weight.
- For thighs and drumsticks only, keep the vegetable quantity moderate and begin checking the chicken early.
- For boneless breasts, use smaller vegetable pieces or cook the vegetables separately so the lean meat is not held in the oven longer than necessary.
- Potatoes, carrots, onions, and garlic are reliable companions; delicate greens, watery vegetables, grains, stuffing, and large amounts of sauce need a different approach.
- A crisp-skin version is a finishing variation: remove the chicken from the bag before exposing it to dry heat.
How to Store, Freeze and Reheat Bag Chicken
Carve or portion the chicken and vegetables before storing so they cool quickly and reheat evenly. Transfer everything out of the disposable cooking bag; do not assume the bag is suitable for storage or reheating.
- Refrigerate leftovers in shallow containers within 2 hours, or within 1 hour if the surrounding temperature is above 90°F (32°C).
- Use refrigerated leftovers within 3 to 4 days.
- For longer storage, freeze portions with some pan juices in airtight freezer containers or bags; quality is generally best within 2 to 6 months.
- Thaw in the refrigerator when possible. Reheat covered in a moderate oven, on the stovetop, or in the microwave with a little reserved juice.
- Reheat leftovers to 165°F (74°C) throughout. Covered, gentle reheating helps protect breast meat from drying.
Oven-Bag Chicken FAQs
These answers cover the practical questions that matter most when using a cooking bag for chicken, from bag safety and venting to browning and doneness.
Can I use a brown paper grocery bag for this recipe?
No. Use only a commercially manufactured bag labeled for oven cooking. Grocery bags, storage bags, sandwich bags, and produce bags are not safe substitutes.
Does the cooking bag need holes?
Follow the bag’s printed venting instructions. Many products call for several small slits near the top, while exact vent size and placement vary. Do not improvise a completely open bag or skip required vents.
Can I cook a whole chicken in an oven bag?
Yes, if the bag is large enough and the package permits it. A whole chicken has a different cooking time from this chicken-piece recipe, so check the thickest breast and inner thigh with a thermometer and cook until both reach at least 165°F (74°C).
Will chicken cooked in a bag have crispy skin?
Usually not. The enclosed steam keeps the meat moist but softens the skin. For more color or crispness, remove the cooked chicken from the bag and finish it on a separate pan using dry heat.
Can I use an oven bag in a toaster oven, broiler, grill, or slow cooker?
Only if the specific bag manufacturer expressly approves that appliance. Many oven bags are intended for a conventional oven and prohibit direct heating elements, broilers, grills, or small countertop appliances.
How do I open the bag without getting burned?
Keep it in the roasting pan, let it stand briefly, and cut across the top with kitchen shears while keeping your face and hands out of the steam path. Do not lift or carry the swollen bag.
Can chicken and vegetables cook together in the bag?
Yes. Choose sturdy vegetables, cut them evenly, distribute them rather than packing them tightly, and leave room for the bag to expand. The chicken still determines the safety endpoint.
Food-Safety Essentials for Chicken in a Cooking Bag
Safe bag chicken depends on both poultry handling and correct use of the bag. Keep the raw chicken chilled until preparation, wash hands and tools after contact, and keep raw poultry and its juices away from ready-to-eat foods.
- Cook all chicken portions to at least 165°F (74°C), measured in the thickest area without touching bone.
- Use the bag only within its labeled temperature and appliance limits, and keep it away from oven walls, racks, broilers, and heating elements.
- Use the supplied tie or another closure specifically approved by the bag manufacturer.
- Never open the bag toward your face; hot steam and liquid can cause serious burns.
- Refrigerate cooked food within 2 hours, or within 1 hour above 90°F (32°C), and reheat leftovers to 165°F (74°C).
For the poultry cooking and reheating endpoint, see the USDA safe cooking temperature guidance.
Recipe Notes
- Use only a commercially manufactured bag labeled for conventional oven cooking. A brown grocery bag, storage bag, sandwich bag, foil pouch, or parchment packet is not a substitute.
- Bag brands differ on flour, venting, temperature limits, and approved appliances. The package directions take precedence over this recipe.
- For crisper skin, remove the chicken from the bag after it reaches 165°F and finish it on a separate pan in a hot oven only if desired. Never broil or dry-roast the chicken while the bag is present.
- Do not add stuffing, rice, pasta, or a large quantity of sauce to this formula; those additions change the cooking load and require a separately developed method.