Beer Can Chicken Rub Recipe for Juicy Grilled Chicken
This homemade beer can chicken rub blends paprika, brown sugar, garlic, onion, pepper, and a controlled amount of chile for savory, lightly sweet barbecue flavor. Use it on a whole chicken cooked upright over indirect grill heat or in the oven.
What This Beer Can Chicken Rub Tastes Like
This is a paprika-forward barbecue dry rub with a restrained sweetness, savory garlic and onion, black-pepper bite, and a light smoky finish. The cayenne adds background warmth rather than overwhelming heat.
- Paprika supplies the red color and mild pepper flavor associated with barbecue chicken.
- Brown sugar rounds out the spices and encourages browning, but the amount stays moderate so it is less likely to burn over indirect heat.
- The upright setup improves presentation and exposes much of the skin to circulating heat; the beer is not a guaranteed tenderizing or steaming mechanism.
- Juicy meat comes from controlled cooking and accurate temperature checks.
Why These Beer Can Chicken Seasonings Work
The blend is built in layers rather than around one dominant spice. Sweet paprika gives the rub its foundation, smoked paprika adds depth without making the chicken taste overtly smoky, and brown sugar balances the dried aromatics.
- Kosher salt seasons the meat and skin; the specified brand matters because different salts occupy a different amount of space in a teaspoon.
- Garlic powder and onion powder distribute more evenly than fresh aromatics during a long grill cook.
- Dry mustard adds a subtle savory tang that keeps the sugar from tasting flat.
- Black pepper provides pungency, thyme adds a restrained herbal note, and cayenne supplies adjustable heat.
- Oil is used only as a thin adhesive layer, helping the rub cling and the skin brown without turning greasy.
- 2 tablespoons sweet paprika
- 1 tablespoon light brown sugar, packed
- 2 teaspoons Diamond Crystal kosher salt
- 1 teaspoon ground black pepper
- 1 1/2 teaspoons garlic powder
- 1 1/2 teaspoons onion powder
- 1/2 teaspoon dry mustard
- 1/2 teaspoon dried thyme, crushed between your fingers
- 1 teaspoon smoked paprika
- 1/4 teaspoon cayenne pepper
- 1 tablespoon neutral oil or olive oil, plus more if needed for the chicken
- 1 can beer, 12-ounce can; pour out about 4 ounces
- 1 whole chicken, 4 to 5 pounds, neck and giblets removed
How to Apply the Rub for Better Flavor
The most important preparation is simple: dry the chicken well, season more than just the top, and create a stable upright base before the bird goes near the heat. Loosen the breast skin gently with your fingers so the seasoning can touch the meat without tearing the skin.
- Keep most of the rub on the exterior, using a smaller amount under the breast skin and a lighter dusting in the cavity.
- Refrigerating the seasoned chicken uncovered for several hours is worthwhile when time allows; it dries the surface and gives the salt more time to work.
- Cook with the lid closed over indirect heat, keeping the chicken away from the active burner or coals.
- A dedicated holder or vertical roaster is more stable than a loose can, especially when transferring the assembled chicken.
- Use a drip pan to catch fat and reduce flare-ups.
- Mix the rub.
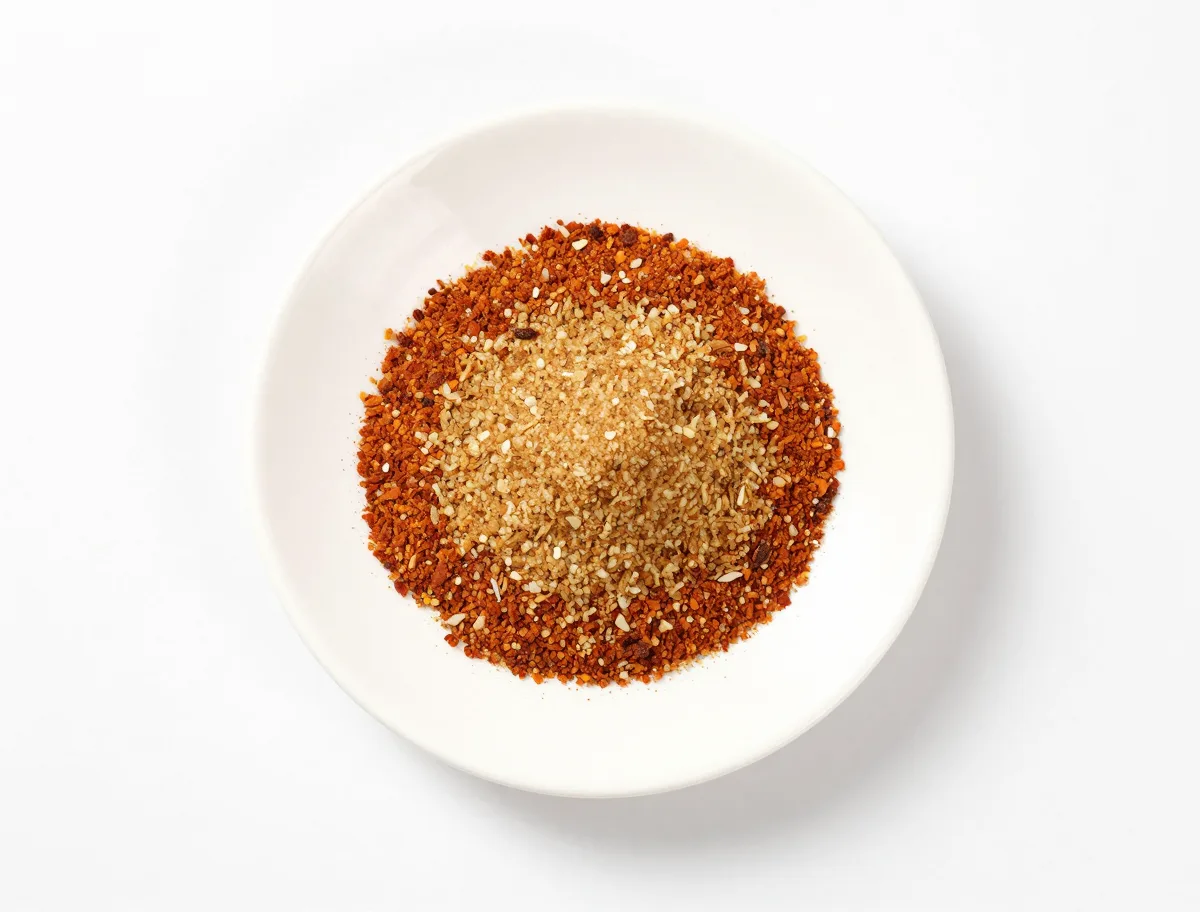
Combine the sweet paprika, brown sugar, kosher salt, black pepper, garlic powder, onion powder, dry mustard, thyme, smoked paprika, and cayenne in a small bowl. Break up any brown-sugar lumps so the mixture is evenly blended.
- Dry and season the chicken. Remove the chicken from its packaging and pat it thoroughly dry; do not rinse it. Trim only loose excess fat or skin. Rub the chicken with the oil, then work about 1 tablespoon of the seasoning beneath the breast skin. Sprinkle a little inside the cavity and use the rest to coat the breast, back, legs, and wings evenly. Set aside 1 tablespoon of clean rub before handling the raw chicken if you want extra seasoning at the table; discard any rub that touches raw poultry.
- Chill uncovered. Place the seasoned chicken uncovered on a rimmed tray and refrigerate for at least 4 hours, or overnight. This gives the salt time to season more deeply and helps the skin dry for better browning.
- Prepare the upright setup. For a grill, prepare a covered two-zone fire or gas grill for indirect cooking at 350 to 400°F. Place a shallow drip pan in the indirect zone. Open the beer can and pour out about 4 ounces, leaving room to reduce spills. A beer-can chicken holder is preferred; otherwise, place the can on a flat, grill-safe pan and assemble the chicken on it before moving it to the grill.
- Position and cook.
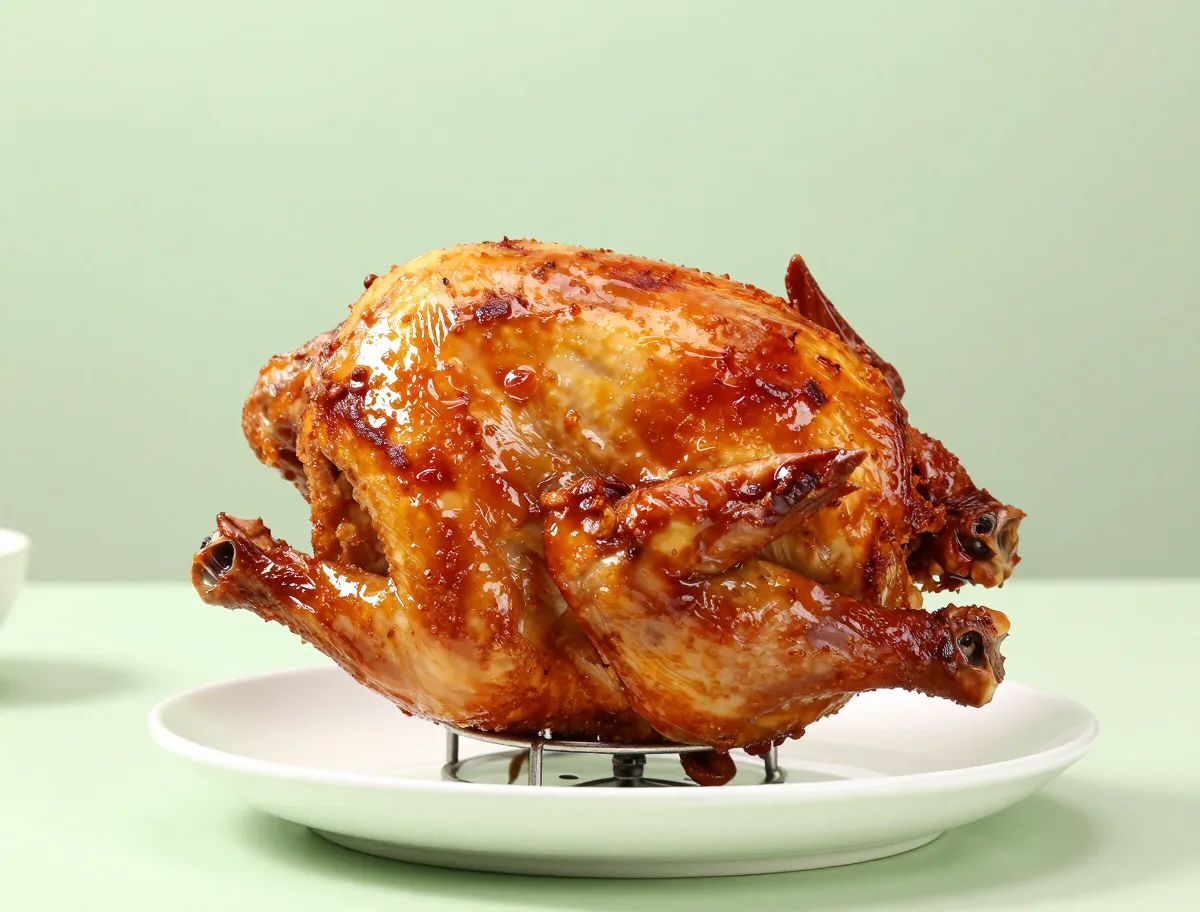
Lower the chicken cavity over the beer can or holder so the bird stands upright, using its legs and the holder or pan for stability. Set it over indirect heat, close the lid, and cook until the skin is deeply golden and a thermometer reads at least 165°F in both the thickest breast and innermost thigh, avoiding bone. A 4- to 5-pound chicken commonly takes 75 to 90 minutes, but begin checking at 70 minutes and let temperature—not time—decide when it is done.
- Finish, rest, and remove the can.
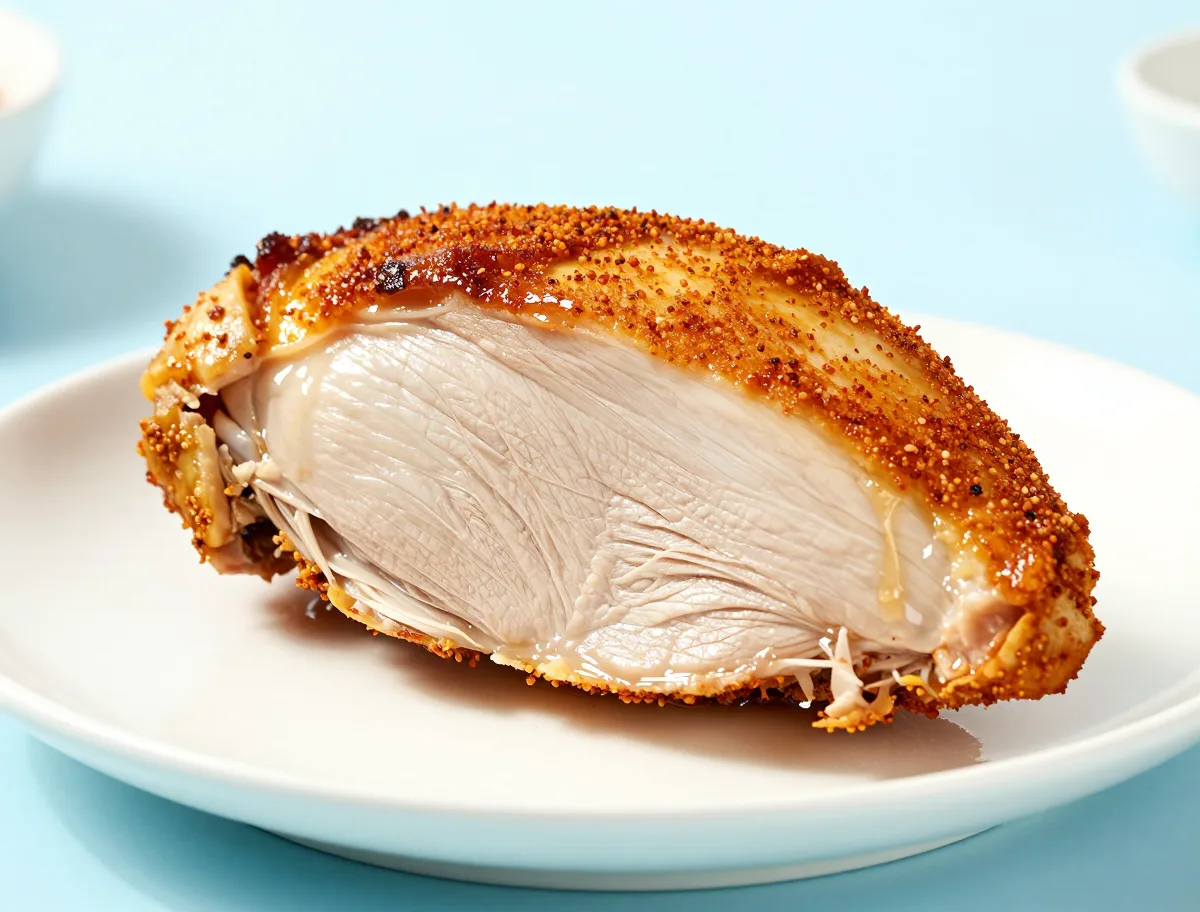
If the skin darkens before the meat is ready, loosely shield the breast with foil and continue cooking indirectly. Once all tested areas reach 165°F, transfer the upright chicken to a sturdy platter and rest for 10 minutes. Wearing heatproof gloves and using tongs, carefully lift or twist the chicken away from the can or holder; the metal and liquid will be extremely hot. Discard the beer and carve the chicken.
- Oven alternative. For oven cooking, use an oven-safe vertical poultry roaster or a stable pan-supported rack rather than balancing a disposable can on an oven grate. Roast at 375°F in a roasting pan until the thickest breast and innermost thigh each reach at least 165°F, about 75 to 100 minutes depending on the bird and equipment. Rest and remove the hot vessel with the same care.
How to Tell When the Chicken Is Done
Look for browned, rendered skin and a leg joint that moves easily, but use those observations only to judge quality. Whole chickens heat unevenly, so one thermometer reading is not enough to establish doneness.
- Insert the thermometer into the thickest part of the breast and the innermost thigh, avoiding bone; check another area if a reading seems unusually high or low.
- Every tested portion must reach at least 165°F (74°C), the safe minimum for poultry.
- A breast can be ready while the thigh is still lagging, particularly if the bird is large or the grill has an uneven hot zone.
- Resting for 10 minutes makes carving cleaner, but resting should not replace reaching the safe temperature before removal.
- The skin is dry-looking, paprika-colored, and browned rather than wet or pasty.
- The thickest breast and innermost thigh each register at least 165°F (74°C) on an instant-read thermometer inserted away from bone.
- The leg joint moves easily and the thigh meat feels firm but yielding; these are quality cues, not substitutes for temperature.
- The chicken rests upright for 10 minutes before the hot can or holder is handled.
The Cooking Variables That Matter Most
This method succeeds through moderate, steady heat rather than a dramatic blast of high heat. Dry skin browns more efficiently, while the sugar in the rub can darken quickly if the chicken sits over direct flame or coals.
- Maintain approximately 350 to 400°F on a covered grill; wind, cold weather, grill design, and lid opening can all alter the actual temperature.
- Use indirect heat so the exterior does not burn before the joints are cooked.
- Bird weight and shape affect timing, so the 75- to 90-minute estimate is only a planning guide.
- The beer can functions chiefly as part of the upright support and cavity setup. It should not be relied upon to steam moisture into the meat.
- If the skin is advancing faster than the interior, shield the breast with foil and continue cooking indirectly.
For additional guidance on indirect grilling, the upright setup, timing, and thermometer placement, see Weber’s guidance on grilling beer can chicken.
Common Beer Can Chicken Rub Mistakes and Fixes
Most problems with whole chicken come from uneven seasoning, unstable positioning, or cooking by the clock. The corrections below protect the chicken while it finishes rather than chasing appearance with excessive heat.
- Bland meat: The rub was applied only to the top. Season the cavity and use a modest amount beneath the breast skin next time; avoid simply adding more salt to the exterior.
- Pale or rubbery skin: The chicken was wet, the grill was too cool, or the lid was opened repeatedly. Dry the bird thoroughly, refrigerate it uncovered, and maintain the target heat.
- Black skin with undercooked joints: Move the chicken farther from the heat, lower the grill temperature, and shield the dark areas with foil while the interior reaches 165°F.
- Tipping or collapsing: Assemble the bird on a flat pan or in a holder before transferring it. A purpose-made vertical roaster is the most stable option.
- Dry breast with underdone thighs: Do not cook by breast temperature alone or rely on a fixed time. Check both regions and continue with indirect heat until the thigh is safe.
- Can stuck in the cavity: Let the chicken rest briefly, then use heatproof gloves and tongs to twist and lift carefully. Never pull a hot can with bare hands.
Beer, Spice, and Salt Substitutions
The rub remains balanced when substitutions preserve its dry, paprika-led structure. Change one element at a time when possible, since paprika varieties and salts can differ considerably in intensity.
- Use nonalcoholic beer as the closest liquid substitute. Cider, broth, or water can also fill the upright vessel, although each changes the flavor and none is essential for tenderness.
- For less smoke, replace the smoked paprika with an equal amount of sweet paprika. For more smoke, use chipotle sparingly in place of some smoked paprika.
- Granulated garlic or onion can replace the powders, but finer powders adhere and distribute more evenly.
- White sugar can replace brown sugar for cleaner sweetness; it lacks the molasses note and may brown just as quickly.
- If using ordinary table salt, reduce the volume as noted in the recipe. Do not substitute it one-for-one by spoon.
- Sweet paprika is the mild default. Hot paprika may increase heat, so reduce or omit some cayenne if using it.
Easy Ways to Adjust the Chicken Rub
Small changes can steer the same homemade beer can chicken seasoning toward sweeter, smokier, hotter, or less-salty barbecue flavor without turning it into a different preparation.
- Sweeter: Increase the brown sugar to 1 1/2 tablespoons, but keep the chicken over indirect heat and watch the skin closely.
- Smokier: Replace 1 teaspoon of the sweet paprika with smoked paprika, or add a small pinch of ground chipotle.
- Spicier: Increase the cayenne to 1/2 teaspoon, or add ground ancho chile for broader chile flavor with less sharp heat.
- Less spicy: Omit the cayenne and use sweet paprika throughout.
- Lower salt: Reduce the kosher salt to 1 1/2 teaspoons and do not compensate by applying more of the completed rub.
- If adding barbecue sauce, wait until the chicken is nearly done; a wet sugary coating can burn long before the joints reach a safe temperature.
How to Store, Make Ahead, and Reheat
The dry rub can be mixed ahead, but keep clean seasoning separate from anything that has touched raw chicken. Seasoned poultry belongs in the refrigerator throughout its make-ahead period, while cooked leftovers require their own time and temperature controls.
- Store untouched rub in an airtight container in a cool, dry cupboard; label it with the date and use clean, dry utensils.
- Season the chicken up to one day ahead and refrigerate it uncovered on a rimmed tray at 40°F or below.
- Discard any leftover rub from the bowl or plate that contacted raw chicken unless it is fully cooked in the recipe.
- Refrigerate cooked chicken within 2 hours, or within 1 hour when the surrounding temperature is above 90°F. Use within 4 days or freeze well wrapped.
- Reheat only the portion needed, preferably covered with a little moisture, until it reaches 165°F.
Beer Can Chicken Rub Recipe FAQ
These answers cover the practical decisions that most affect seasoning, stability, timing, and safe handling.
How much rub does one whole chicken need?
This recipe makes about 4 1/2 to 5 tablespoons, enough for a lightly to moderately coated 4- to 5-pound chicken, including the cavity and a small amount beneath the breast skin. Use less if the bird has already been dry-brined.
Should I oil the chicken before applying the rub?
Yes. Pat the chicken dry first, then apply a thin film of oil so the spices adhere. Avoid saturating the skin, since excess oil can make it greasy and encourage flare-ups.
Where should the seasoning go?
Apply most of it to the exterior, with a modest amount beneath the breast skin and a light amount inside the cavity. Seasoning only the top surface produces patchy flavor.
How much beer should remain in the can?
Pour out about 4 ounces from a 12-ounce can, leaving roughly two-thirds full. The extra space reduces spill risk, particularly when the liquid becomes hot.
Is a beer-can chicken holder necessary?
No, but it is recommended because it provides a broader, steadier base and makes handling easier. If using a can directly, assemble the bird on a flat grill-safe pan before moving it.
Can I make this recipe in the oven?
Yes. Use an oven-safe vertical poultry roaster or a stable pan-supported rack at 375°F. Roast until both the thickest breast and innermost thigh reach at least 165°F.
How long does beer can chicken take?
A 4- to 5-pound chicken often takes 75 to 90 minutes at 350 to 400°F, though grill design, weather, starting temperature, and bird shape can change the timing. Begin checking early and rely on the thermometer.
Can I use nonalcoholic beer?
Yes. Nonalcoholic beer is the closest substitute and keeps the upright method intact. It supports the setup but is not required to make the meat tender.
How do I remove the can safely?
Rest the chicken for 10 minutes, then wear heatproof gloves and use tongs to keep the hot can upright while gently twisting or lifting the chicken onto a stable platter. Never handle the can bare-handed.
Food Safety for Whole Beer Can Chicken
Treat raw poultry, its juices, the hot can, and the drippings as separate hazards. Good setup and careful thermometer use matter more than the color of the skin or the appearance of the juices.
- Keep raw chicken refrigerated at 40°F or below and wash hands, boards, counters, utensils, and the thermometer after contact with it.
- Do not rinse the chicken; patting it dry limits splashing and improves browning.
- Reserve clean rub before seasoning. Never return rub that touched raw poultry to its storage container.
- Verify at least 165°F (74°C) in the thickest breast and innermost thigh without touching bone; clear juices are not a reliable safety test.
- Use heatproof gloves and tongs for the hot can, holder, pan, and drippings. Move the assembled chicken only when its base is stable.
- Refrigerate leftovers within the applicable two-hour limit and reheat them to 165°F.
For official guidance on poultry and leftover temperatures, consult the USDA safe cooking temperature chart.